Showing posts with label Kitchen Reno. Show all posts

Wednesday, January 19, 2011

I’m Such a Show Off!

At least, on The DIY Show Off!

The DIY Show Off


So if you’ve stumbled upon my blog from there, welcome :) My husband and I spent about 3 months and $3,000 renovating our kitchen with our own bare hands, and I’m so proud that it took so little to make such a huge impact. In fact, I was so excited to post the grand reveal, that I completely forgot to show a single shot of my DIY curtains… which are really just Target napkins sewn together.

Product Image Home Floral Napkin Set of 4 - Red (20x20")

(HEY YOU: the green/blue version of these napkins are on clearance RIGHT NOW for next to NOTHING in price. The pattern is gorgeous, so go check them out before they’re gone!!)

Product Image Home Floral Tablecloth - 60x84

[IMG_6582[3].jpg] [IMG_6583[3].jpg]

I posted some of these pictures already back in the summer, but I think those big red puff balls, red microwave, yellow and orange hand towels and pink mixer make a little more sense when you can see the one thing in the room that pulls them together.

[IMG_9333[4].jpg] IMG_9493IMG_9507

And although I left the obvious seams, I pretend it’s just character. ((Really, it’s laziness. Shhhhhh.))

IMG_9499

IMG_9496

So I hope all you new followers/readers/visitors will come back and join me some more. I’m so pumped to be featured (Thanks Roeshel! I love your site!) and even more excited to get to know more fellow bloggers. DIY Show Off is a huge source for finding awesome new inspiration from the blogging community, and I’m forever amazed at all the fantastic ideas people come up with and do themselves. I like to think I’m creative, but not as much as most of you guys!

Monday, January 10, 2011

A Kitchen Renovation: The Grand Reveal.

Finally, after much anticipation (and a comment from a follower saying she googled my counters, kicking my butt in gear) here’s the Official Grand Reveal!

BUT, we must start off from the beginning. When it was my grandparent’s kitchen. With 3 different types of cabinets, 6 mismatched appliances, 100% of them broken, and the same paint color that was throughout the entire house: Old Yeller.

22

Now I present to you: her Mocha Deliciousness.

IMG_9333

The sink area was always a little messy.

26

To quote Edgar Allan Poe, “nevermore.”

IMG_9337

It went from side by side top loading (and broken) washer/dryers,

28

To stackable dreamies.

IMG_9321


We tore down the original 1950’s steel rusties,

32

34

To make room for our Red Rider Microwave and pseudo-bar (and bonus-points-worthy Kill Bill weaponry station in the back).

IMG_9342

It took 3 months of DIY-intense labor, but it was SO worth it. The only things we hired out for were the electrical (since we had exposed outlets wired to the top of our counters) and plumbing (since it was all original, and needed updating behind the wall). All of the cabinet building, floor laying, appliance installing, interior plumbing, splackling, and misc screwing/hammering/gluing/painting was 100% us. It’s just hard to believe we went from this

stonenexusblack

To this.

IMG_9318

Now that’s, Divine.

(you can check out the full serious of “A Kitchen Renovation” here)

Friday, July 2, 2010

A Kitchen Renovation: Chill Out!

Our old fridge has been in this house for a VERY long time. Long enough that I barely remember my grandparents buying it. That means it’s REAL old. It was pretty dirty

IMG_6594IMG_6596

And it was starting to show it’s age elsewhere. Wasn’t making ice properly, the water wasn’t filtered so we couldn’t use the door. Probably not the worst problem in the world if the thing still kept our food pretty cold, which was the point of the fridge. However, that’s a lot of space taken up by an icemaker and water dispenser when we actually like to store more than 2 meals. We decided to replace it. And benefit from a tax rebate.

IMG_6600

Bye bye fridge. You’ll always hold a special place in my heart.

Now. In with the new! It’s a Whirlpool. Surprisingly, sold out since we bought it!

IMG_6606Why did we get a french door/bottom mount freezer? Well, it’s not because it’s trendy. Or the fact that it’s so much more expensive than a side by side and I just like blowing money. It’s cause it holds a TON of food in the fridge part, and wider things than we could previously fit. Also, the bottom mount freezer means I CAN REACH EVERYTHING! Power to the shorties!

This one sticks out less than our old one. It’s almost counter depth! IMG_6648

And is seamless with the doorway.

IMG_6660 Now time for a little flashing. This fridge isn’t shy.

IMG_6649IMG_6651

Oooohhh aaahhhh. My favorite part is the can dispenser. Just open up that perforated area on the box, and slide the dispenser plastic bin over the end of the box, and pop it in the door. That grip is solid too. It’s almost tough to pull out a can, which is important in ensuring it staying tucked in it’s holder.

IMG_6653

bliiinded by the liiight. Look at all that space! There’s only one lone TOE-MAY-TOE in the veggie bin. Hopefully that will change soon since I so embarrassingly only have condiments and beer stocked. Yes, I dedicated an entire shelf to all our beer. My man is pleased.

IMG_6654

Here’s the freezer. I love that I can get to it from both sides comfortably as well as overhead.

IMG_6656 I was shocked to find how many bottom mounts didn’t seem to have room for pizza boxes. Call me unhealthy, but that’s a staple in this house. Every week. Except this time, because we just ate our last box. It’s so nice and roomy. Swooooon :)

IMG_6658

I’ll leave you with a goodbye from Ceiling Cat.

IMG_6611

He’s watching what you eat, so you don’t have to.

Tuesday, June 29, 2010

A Kitchen Renovation: Laminated Part 2.

I noticed my blog is coming up a lot on google searches for "Formica 180 FX Antique Mascarello Laminate Countertops" or some variation of those words. And although I decided against it midway through the remodel, because we had to rewire and replumb (is that a word?) the entire kitchen and half the house, we decided to go ahead with it after all.

Formica Brand Laminate 30
We found a GORGEOUS granite at a local stone yard that we were ready to order, but wanted to check out Blue/Orange in hopes they'll have a cheaper, similar granite. It was then that I found Lowe's finally had samples of the 180FX counters that, up until this point, were non-existant in ANY local big box home improvement stores. All the sales associates were clueless about this "new" product every time I asked, and I was getting frustrated... which led us to picking out granite. The first time I found out about the 180FX counters was at least January/February, and they still had no idea about them in April!


So I was giddy with excitement when I saw the sample book at Lowe's. I took home a pamphlet that you can unfold and see what a good example of the slab of Blue Storm will look like, complete with raised texture similar to the actual samples. This was REALLY cool because it was just your generic glossy paper, but with texture! I had been eyeing the Antique Mascarello online for months, and in person it PERFECTLY matched my paint sample (Valspar Iced Chocolate. The perfect milk chocolate color to go with these counters.). I was floored. Sure it looks fake, and feels like laminate, but I knew it would be significantly cheaper, and do the job in the kitchen for the remaining years we're going to live here. I took a picture of it with my camera phone WITH flash so some of the texture would show up.

downsized_0514001944
The problem was, every time we went to Lowe's there was never anyone in sight in the cabinet area. No one to ever help us, no matter what the hour of the day it was. I finally broke down and called to see if anyone was available, and EUREKA, they were! Not only that, the guy knew what I was talking about AND had an accurate quote. I guess they just needed one more month to get it in and learn about it? Ugh. But for you lucky readers, Formica actually has downloadable PDFs of the counters to use as samples.

This is just for the Richmond area Lowe's, so I can't promise it's the same pricing anywhere else. It's $29.17 a LINEAR foot (compare that to $59 per SQUARE foot for the Brazillian Fantasy Granite). The installation is $195 including a free sink cutout (which you have to pay for at some places) bringing the grand total for our entire kitchen to.... $750 installed. Not bad, considering granite was $2,000 installed. Granted, that's GRANITE, but we're on a budget here, people. And in a starter neighborhood. My dad has been warning me countless times not to overdo it. I just watch enough HGTV (or did, before DTV lost it :( ) to know first time home buyers still expect a luxury kitchen, even in a starter home.

You have to pay $35 for Lowe’s to come measure, but it’s applied to your installation if you use them. They told us they’d be there at X time to measure, and they were Johnny on the Spot. They said it would take 3 weeks to come, it came in just over 2. They said they’d be at our house to install at 8am. They were there the second the clock struck 8. I couldn’t believe my luck.

downsized_0616000820

I took one look and knew it was going to go downhill. It was perfect, except they didn’t use my template to cut the hole. Yeah, it ended up being too big, and we had to order a new slab :(

downsized_0616001737

Lowe’s came to the rescue, and got us a brand new slab, used our template, and installed it… yep, on the dot at 8am THE NEXT MORNING. Now, I’d like to know why I had to hold up my entire kitchen renovation for almost 3 weeks if they could turn this around in less than 24 hours, but whatever.

The edges are almost invisible in the pattern, unless you’re looking hard. Or have your camera on macro focus ;)
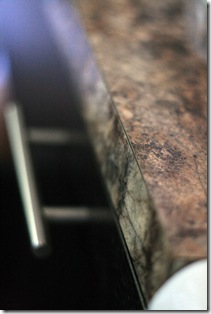
IMG_6488The sink is SUPER deep. I could take a bath in this thing. For an overmount, it looks really contemporary, and it’s actually fun to wash things in now! It was also so worth the trouble we caused with the counters. It’s from Overstock, and it was only about $150.

IMG_6536 We got a chrome faucet, and it was just WAY too chrome. We ended up trading this one for a stainless finish to go with the sink better.

IMG_6537It’s absolutely gorgeous. I’ll be posting more pictures as we wrap up the kitchen. In the mean time, here’s a teaser cell phone shot with our Coffee Bar in the corner. The silver bowl holds our K-Cups and the sugar is in the pink glass :)

downsized_0618000835a
IN CONCLUSION, with those savings we can replace our stinky, dirty, 20 year old fridge AND buy some dining room chairs. I say deal.

Saturday, June 26, 2010

A Kitchen Renovation: Take Cover!

The cover panels. The missing puzzle piece to our cabinets. When we installed these last night, it literally felt “finished.”

Here is what we were working with the last 3 years. The holes are for the brackets that hold our shelves:

IMG_6573 Pretty stark. Now with a cover panel:

IMG_6571

IMG_6574 Then the Decor Strip. I’m in love :)

IMG_6579 Then the other side of the kitchen. Sadly at my eye level, I can see the cabinet frame, that’s Birch. You can see here how we worked the pink mixer into the design thanks to my Target napkins!

IMG_6582 Same for my happy red microwave.

IMG_6583

Now for the really exciting news… Our new fridge is being installed today! The only appliance we had to buy for this reno :D I’m currently laying in bed, awaiting it’s arrival. Look out for the review on Friday, so we’ll have about a week to get to know it better!

Friday, June 4, 2010

A Kitchen Renovation: Get Low.

Finally, time to feature those beautiful lower cabinets:

IMG_6318

I’m so glad we changed our minds to the dark brown doors. You can see how the fabric and wall color pull together here. I also love how the floors are dark, but not so dark they compete with the dark cabinets.

IMG_6355IMG_6354

Here’s the drawer by drawer break down. Unorganized, of course :)

IMG_6363IMG_6364

IMG_6365IMG_6366

IMG_6359IMG_6360

IMG_6362

IMG_6357IMG_6358

IMG_6369IMG_6368

Oh my goodness, it’s SO MUCH storage! And that landfill chair came in handy to install the handles on the cabinets that will be above the fridge:

IMG_6294

It will be nice to conceal all that junk we had on top of the fridge the last 3 years.

IMG_6299IMG_6305

We’ve only installed the cover panels on the bottom, but the sides of the uppers will be black soon :) After that, we’re just on standby for those counters. We’ve been using a $7 as-is desk top in the mean time, because I’m a genius.

IMG_6371

It’s come in handy to prepare food and microwave in there finally. I can’t wait to get legit counters though. Just 2.5 more weeks!