Saturday, November 28, 2009

Dining in Style.

You've seen some recent pictures of the dining room from the Turkey Day decorations, and I'm sure you noticed the wood paneling. The dining room was stuck in a major time warp when we bought the house. In fact, the whole house was, and I have proof in the receipts my mom just found of some remodeling that was done in the 70's. I'm not saying anything is wrong with that time, it's just not my favorite. Here is what the room looked like when it was my grandparents:

Little bit of nostalgia for you. The dining room was unchanged my entire life, aside from the carpet. It went from an orange/yellow/brown shag to a nice neutral beige. But it was still the same green trimmed, woodpaneled, pool hall chandeliered room. And it still wouldn't be so bad, except there was an almost identical shade of wood table and chairs in there (not to mention the buffets and cabinets that were in there that were all the same shade).

That was after we took over and cleared out the furniture except the necessities. Now you can see it's a sea of brown. It was cool last Christmas when I found some old linens and made it sort of a cabin, homey feel of Christmas:


...but otherwise, it needed a little toning down. I decided to use my free time when I woke up this morning and find a way to make it a little brighter and more stylish. Problem is, neither one of us want to take down the paneling. We learned from the bathroom remodel that opens up a can of worms, and the last thing we want to do is replace the dry wall again. So we're playng safe, keeping the paneling, and finding a way to make us BOTH happy with it:


It's a little all over the place, but I just tried to combine all my favorite elements into one big picture. Cushy captain chairs, zebra rug, anthropologie knobs, Emeco (knockoffs, I'm cheap!), Damask curtains, and the $39 Diversity Thrift table. I've spent the whole time we lived here throwing together so many different looks for this room, using inspiration, and nothing stuck. I finally started going with my heart and now I found a look I love. It's not easy finding your style!

We're planning on staining all the floors in the house, and I'm really leaning towards a dark stain. But because of that, the walls will need to be lighter or we'll really be swallowed up by all that wood! I initially looked into white washing, but that was pretty insane. So I thought I'd try a light stain instead. And to really help tone down the walls, no matter if we change the wood stain on the paneling or not, would be a gigantic canvas covering most of the upper wall. I took note in a lot of the metropolitan/glamorous spaces I've been lusting over there are big ornate frames covering the walls. And it REALLY brightens the space up. I figured I could just paint a large canvas, and put the miter saw to use some more to frame the picture.


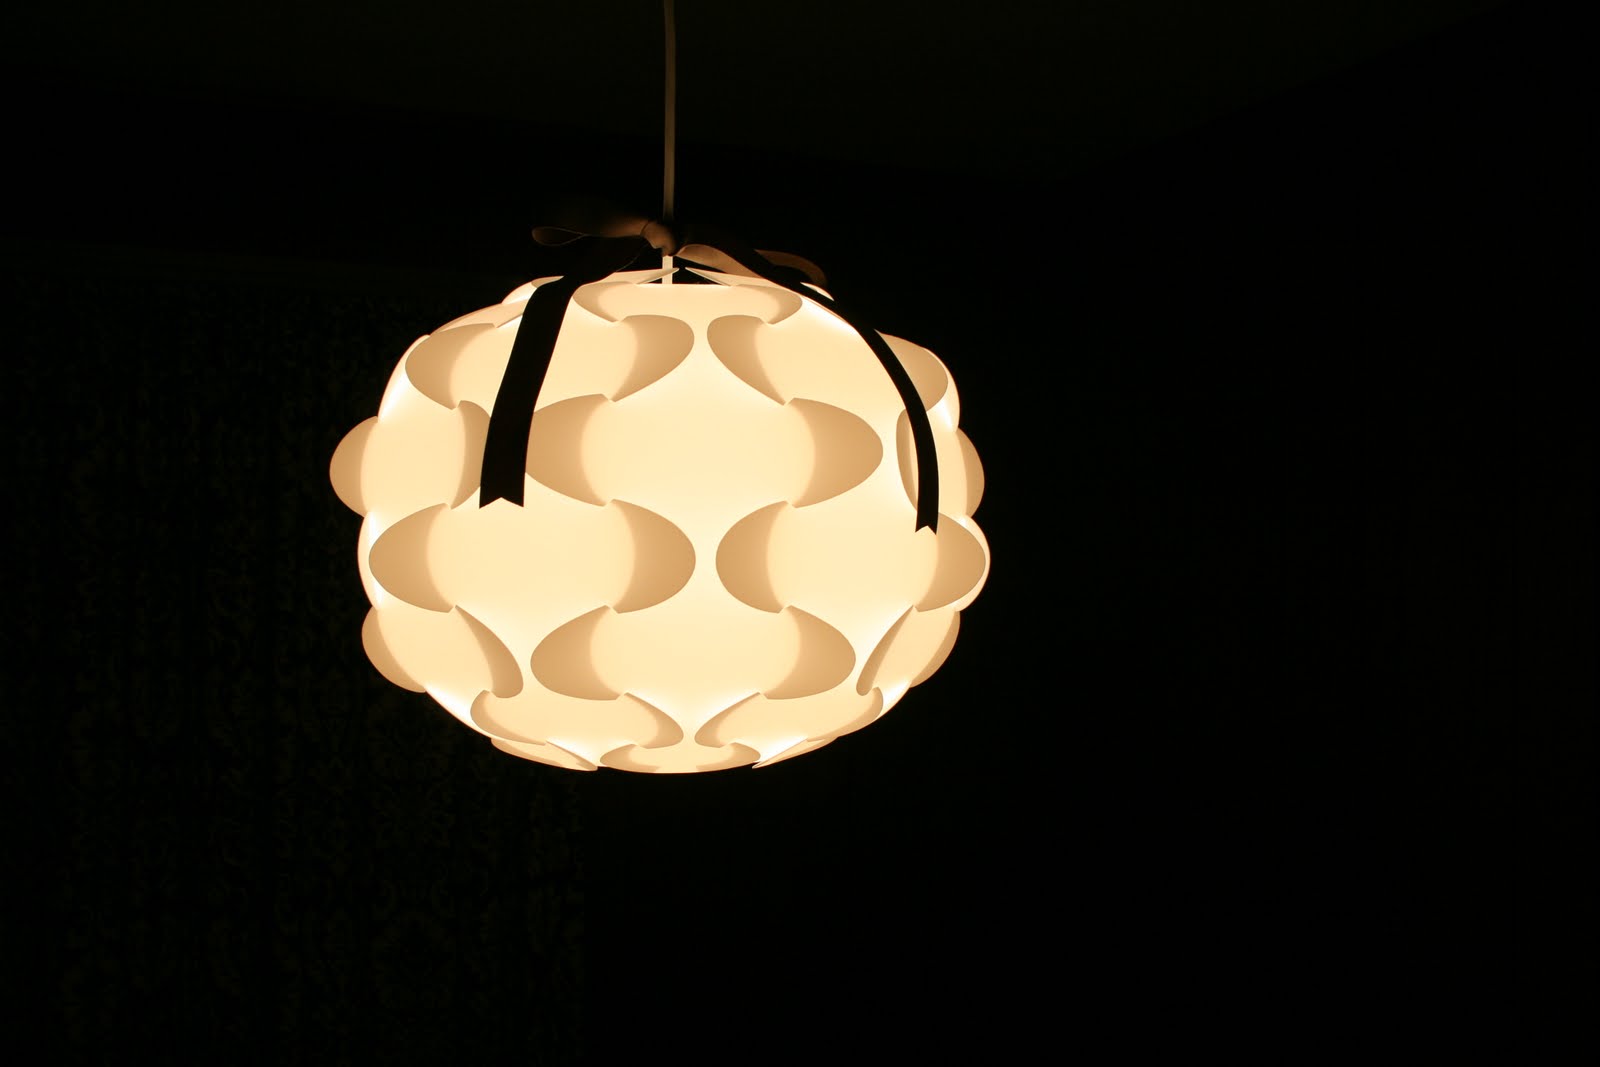
I've also wanted an old decorative wood buffet to hold our dishes so I don't have to use a step stool to get the daily settings. I like the dark wood stained top over the white painted piece, with some pretty little amethyst Anthro knobs. Since a lot of the pieces in this room are diving hard over the line into traditional, the contemporary Ikea light fixture will help keep it in this century, and I'll find ways in the accessories to keep it more modern. Since this is a longterm look, hopefully the next place this set resides in will have normal walls surrounding it to make it easier to decorate!

Friday, November 20, 2009

Roomboard: How Alluring.

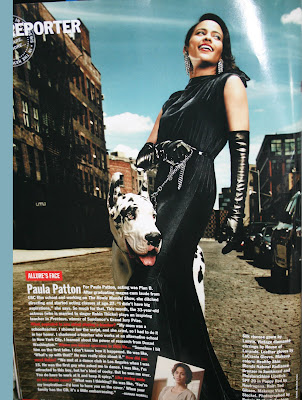
I was flipping through the stack of magazines my mom passes on to me when she's finished, and thought I'd study up on the latest trends in clothing... to avoid. But this picture from the November issue of Allure caught my eye, and the colors and architecture were love at first sight.


I sat and studied every detail in this picture, because it was all pure perfection to me. And trust me when I say this, that never happens. I guess I was just in an observant mood! The more I looked at it, the more I thought how awesome each detail would look as pieces in a room. Would you expect anything less from me?


Though this doesn't really NEED explanation, so I'll try to keep it short!

The fireplace reminded me of the texture and stone of the road. The painting's designs and colors are pulled from all the colors in the picture, and made me think of the bricks and windows of the buildings. The white vases on the fireplace are shaped like the clouds in the sky, and I used the texture of the clouds to pick out the shag rug. The slipper chair fabric is identical to the red building above the puppy's head. The coffee and side tables were inspired by the buildings colors, windows+window trim, and even the ladders on the buildings. The cowhide pillows were as close as I could get to the pretty coat on the puppy. The wall sconces are so cliche being inspired by her earrings, but hey, it works. Keeping with the outfit inspirations, those hot black leather gloves she's wearing translated to the sleek Ikea sofa. The table lamps look exactly like where the sidewalk meets the brick road, and the big elephant in the room: wall color from the sky! I chose Harbor by Behr. I picked it by eyeballing swatches online with the magazine spread, and was shocked to find it was almost dead on to the picture once I uploaded it!

I almost wish I had another room to design to make this happen. Oh, please, someone want this so I can do eeeet!

Thursday, November 19, 2009

Table for 12... Million.

We decided to get some use out of the beautiful table setting I'm so proud of with dinner tonight, and I thought why not invite all of our friends over for a meal as well? Small problem; our table only seats 6. But a blog seats MILLIONS. Drew spent all day slaving over the crock pot and made some tasty potatoes and served them along side some delicious ribs. So grab a chair (or most likely, just sit where you are) and come join us! I hope you're hungry!

I love these plates soooo much. They go with any and every color, and even though it's a pattern, it's a simple pattern that can also tie in with any design.


Before noms:

After noms:

And it wouldn't be a romantic dinner with Drew without a spill! He's been spilling his meal since the first day, scratch that, the first HOUR, we met. And that's why I love him.

My glass is always half full. Cause that's all I can fit in my tummy.

So glad you could join us for dinner. I hope you enjoyed yourself! We're stuffed.

Wednesday, November 18, 2009

An Autumn Setting.

I spent the evening rearranging and changing up centerpieces around the house to feel less Halloweeny and more autumny. Although we aren't hosting any Turkey Day gatherings, I wanted to take advantage of the warm fall colors before we change out to the jeweltone Christmas decorations after Thanksgiving. Every year I can't wait to clear out the Gobbles and bring in the Jingles, but this year I'm sort of mourning the fall colors so soon.

For the dining room, I already had the fake leaves and potpurri from two years ago, which I had spread around the living room. I took the colors from the leaves and raided the finally organized craft room for some scraps to use. I got a bunch of 1 yard scraps of fabric for about 60 cents each a while back, and one of them was the gorgeous maroon shade I used as a runner. I didn't want it to blend too much with the table, so I threw the linen fabric I had slated to make a pillow or two out of underneath to break up all the reds. Then I took some brown ribbon and tied a bow on the chandelier to warm it up a bit.


On the cake stand, I kept it covered with leaves and then I took two wine glasses and filled them with a leaf and lots of potpurri pieces to bring some height to the colors, but still add a touch of sparkle with the glass.

I didn't want to use anything at our wedding that we couldn't bring back home afterwards and put to use, which is why I DIY'd almost every detail in the wedding to our exact design taste. These hurricane glass votive holders were the main centerpiece at the wedding. I was going to add candles to them, but I'm going for fulltime warmth in here. I've made a habit of keeping even the smallest scraps of fabric because I eventually find SOMETHING to do with them. I had slivers of fabric left over from the pillows I made for the living room, so I stuffed them in the votive holders! The little candle holder was our wedding favor with our names and wedding date on them.


For the living room, I have a small problem. I don't have many accessories that are nice warm colors, or even white for that matter. I had a big bright color fascination when buying accessories up until recently. So I had to improvise. And since Turkey Day is only a week away, I wasn't going to sweat this too much. I stacked one of the red vases on 2 out of the only 5 books I own (here is a etiquette book from the 50's and a photography book from the 60's. yes, the only books I own aren't even mine! they're my grandparents) I layered a shot of downtown that was framed in the bathroom before the latest redesign with a picture of my old mini in the Fall of 05. And lastly I placed one of my grandma's vases on a saucer and filled it with calla lillies from the wedding bouquet I carried at my friend's wedding.


For the coffee table I just took the apples we got at Carter Mountain a month ago (they hold on for a LONG time!) and placed them in the usual white platter with leaves. Simple, but I love the colors.


I decided to keep the picture of my niece just a little bit longer, and pulled the orange candle over to this side table to bring out the pumpkin costume she's wearing.


For the other side table, I collected all the loose corks and put them back in the jar they originated from and set it with my beloved pony and some more fake leaves to keep it colorful.


Boy am I going to miss these colors in a week. We're going to have to put these decorations to use so I don't feel so bad replacing all these amazing warm colors with ice cold silver, white, and shiny sapphires and amethyst shades!

Thursday, November 12, 2009

Roomboard: Melinda's Main Squeeze.

Although this was my second room to makeover from pictures of an already existing space, it was my first big challenge since the last one was a bathroom with the (permanent) bones already there. This bedroom belongs to Melinda. I made her the Wizard of Oz room a couple weeks ago for fun. However, she wants to keep the wall color and the main furniture, but make it look more grown up.


Like most women, she’s a big fan of Target. Who isn’t? Their stuff is stylish AND affordable. So I decided to use only Target purchases in this room as part of my challenge. And a challenge it was. I had to break down and cheat in the end by using fabric from another website for the curtain and the cushion on the end of the bed, but that’s it! Surprisingly, Target doesn’t have such a wide array of curtain patterns in black and white as I hoped. Now let’s break it down!


1. Melinda already had 2 black bookshelves that looked like they got a lot of use, so I wanted to incorporate them in a way that they’d be even more functional. I stuck them behind the chair so she can have her books within reach while she’s lounging around, and she can used these frosted storage bins to hold all her odds and ends. To make it less of a library, I put some chic contemporary accessories on the top shelf. She already had a white bedside table, so I took it from her bedside and used it as a side table for the chair. Suddenly the dark bookshelves aren’t dark at all!

2. She has a dresser that she has painted many times, but what’s one more coat for good measure? I chose a charcoal color (try Ralph Lauren's Urban Loft line in Bleeker) so it’s a little darker than the knobs so they still stand out, but not quite as dark as the bookshelves since it’s a large piece that will be standing alone. She already has those super modern pulls, so the only investment in this piece is more of that paint! I pulled some design cues from a dining room buffet by flanking the drawers with two lamps, a centerpiece of lemons in a circular bowl and a crisp black and white portrait behind it.

3. The chest in front of the bed was also an existing furniture piece that was up against a wall. I moved it in front of the bed and chose the charcoal color again for this piece to tie in the dresser since they’re two different styles. I picked a very thick, white textured fabric cushion to go on top so Melinda has a place to put on and take off her shoes.

4. The only furniture I added in were a headboard and the side tables. The headboard is an easy DIY, but this headboard came with the picture. Since Melinda’s room is upstairs with sloping walls, I wanted to bring in lots of reflective surfaces, so I chose these mirrored side tables. They not only add sparkle and light, but lots of glam as well!

5. Now onto all those wonderful fabrics! I chose a clean, modern circle pattern bedding since it wasn’t busy, but still had some pizzazz. I chose two charcoal pillows with a damask pattern (for $15!!) to pull in the side chair design and the color of the chest and dresser, and a yellow/white tie die effect pillow to go front and center to pull in the wall color and add a touch of personality. The window sheers are a burnout pattern to pull out the design in the punchy yellow pillow, and the center panel is fabric I pulled online from Timeless Treasures. I also found the fabric pattern on that side chair online, so it can be bought and used to recover her existing papasan chair, if she chooses to keep it. Although it’s a lot of different patterns, using only 4 colors to tie them altogether helps keep the look cohesive.

6. Next up, those accessories! As you can tell, I pulled in my usual circles and squares. It’s easy to design a room just mixing and matching those two shapes. As I mentioned earlier, I wanted lots of reflective accessories and surfaces to make the room feel larger. So I chose that super chic sunburst mirror to shed some light on the dark colored shelves, which has little capiz shell details. I love those ball lamps, but instead of the usual acrylic balls, I went with chrome to inject some industrial chic in this space along with the bowl on top of the dresser. I picked this bowl because it has the same look of the bedspread, and filled it with lemons to pull in that punchy yellow pillow from the pillow and curtain panel. I also used one more bright yellow detail with that daisy flower dish on the chair side table. This can be used to hold Melinda’s rings, earrings and any other little trinkets. I put in some pale pink flowers in a black and white vase to match up with the candle holder on top of the bookshelves, and add a personal touch with her initial on it. The frame around the large picture is actually bronze, which is pulled from the pharmacy lamp beside the bed, and picks up the tones in the wood vase that is on the book shelves. I went along with my trusty black framed, white matted black and white portraits over the bed since it’s a classic look that works in any space. I chose black lampshades to detain the ambience to a close proximity, and I only used table lamps make the room feel more cozy and elegant. No harsh lights in this peaceful getaway!

A lot of things in this room can be DIY’d, from the lampshades to the curtains. Here’s some tips:

Curtains are so easy to make. Just measure from top to bottom how long you want the panels, then add 4 inches to the top and 2 inches to the bottom for seam allowances. As for the width, measure the width of your window, and that will be how wide you want ONE panel to be. Don't forget to add another 4 inches to your width measurement for seam allowances. I just used a store bought panel as an example when sewing the pocket for the rod, and it was piece of cake.

In this picture, the headboard came with the bedspread picture I found online. But you can just cover painting canvases with fabric and hang them in a grid, or if you’re really handy you can nail three 2x2 pieces of wood together in the width of your bed and as tall as you want, and nail batting and a solid fabric to it.

The chest cushion for the end of the bed is an easy DIY project as well. Cut some foam to the size of the chest, then sew on some fabric. Next, tack on some straps to tie around the top door of the chest. That way every time you open it, the cushion stays put. Of course, you need a little sewing know how, but if you can find something in your house that’s similar, just study how it’s made and jump in and try it!